Enabling camera access
Follow these steps to (re-)enable camera access for the Face Scan in your browser. Make sure to follow the documentation for your browser.
Desktops and Laptops
Chrome

- Click on the icon next to the webpage URL, on the top left op the page.
- A popup-up will appear. Toggle the switch next to 'camera' to allow camera access.
- Verify that the switch is turned on.
- Click the Try Again button once again. If nothing happens, try reloading the page.
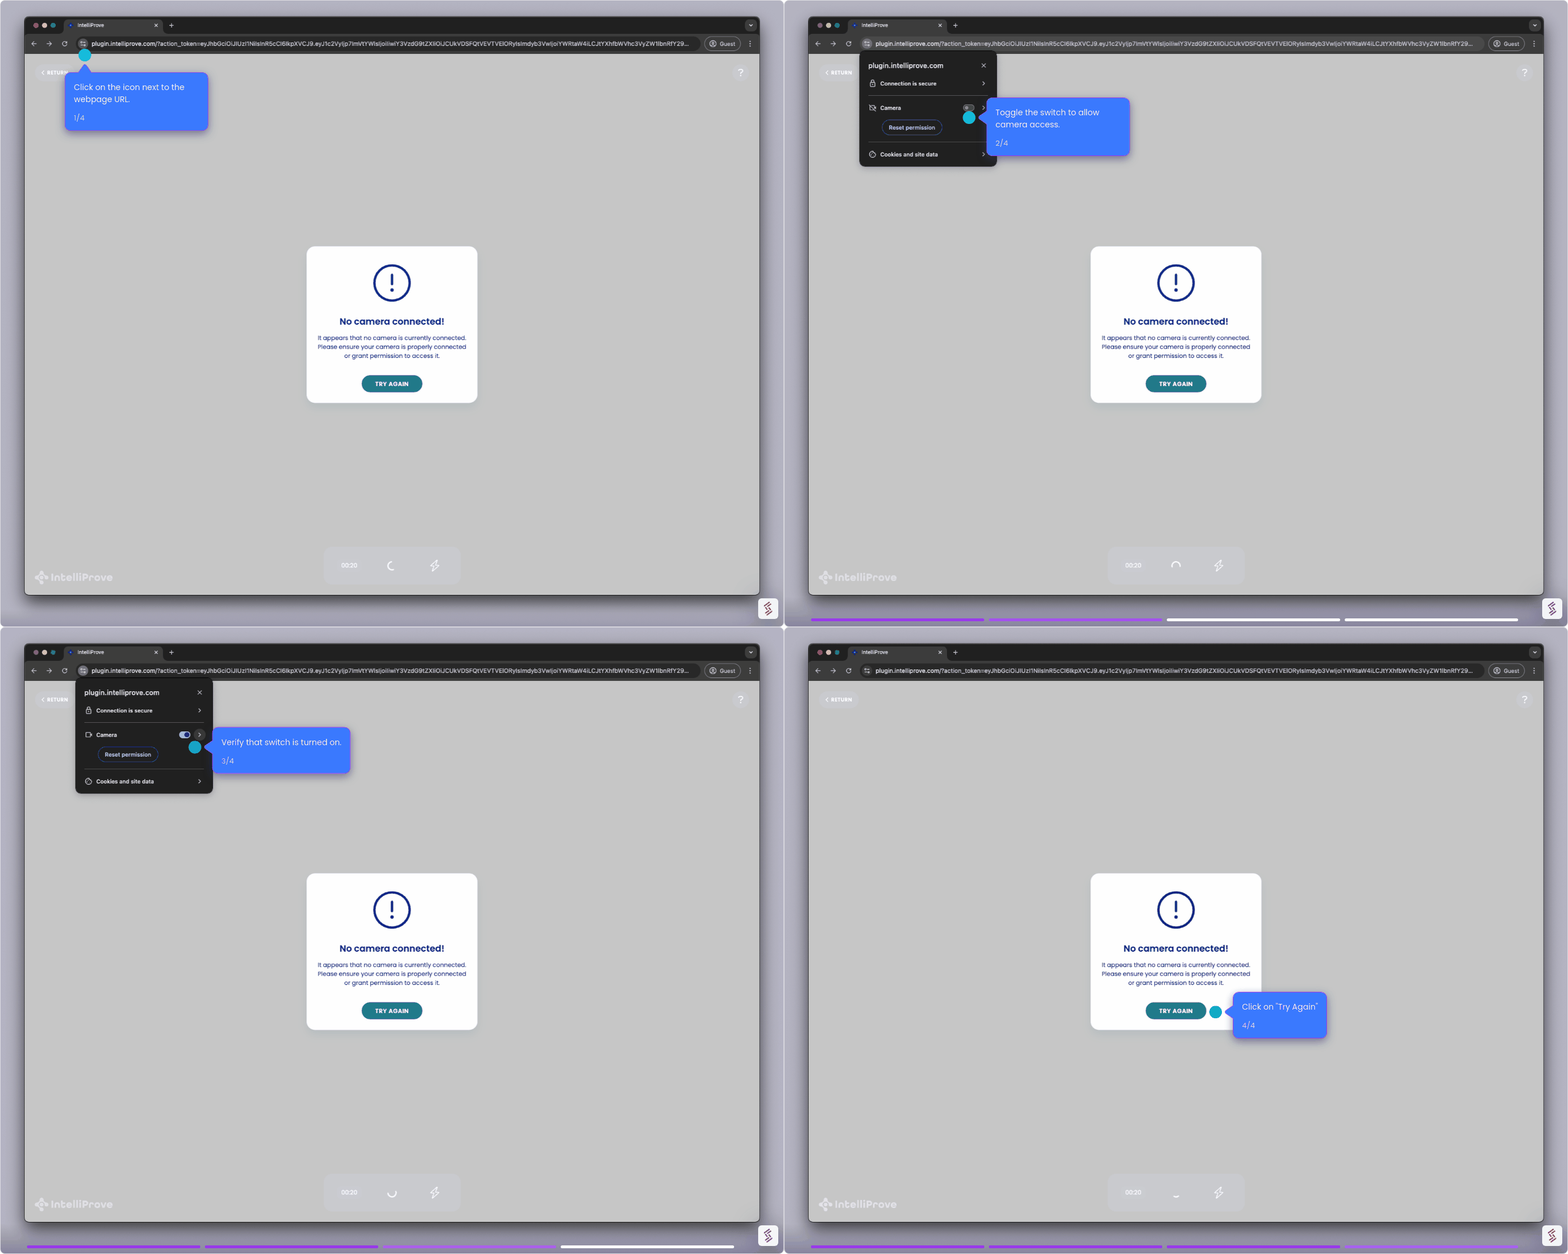
Enable camera access in Chrome
Firefox

- Click on the icon next to the webpage URL, on the top left op the page.
- Click on the button displaying blocked.
- Click on the refresh button to reload the page.
- Click on Allow when prompted to allow camera access.
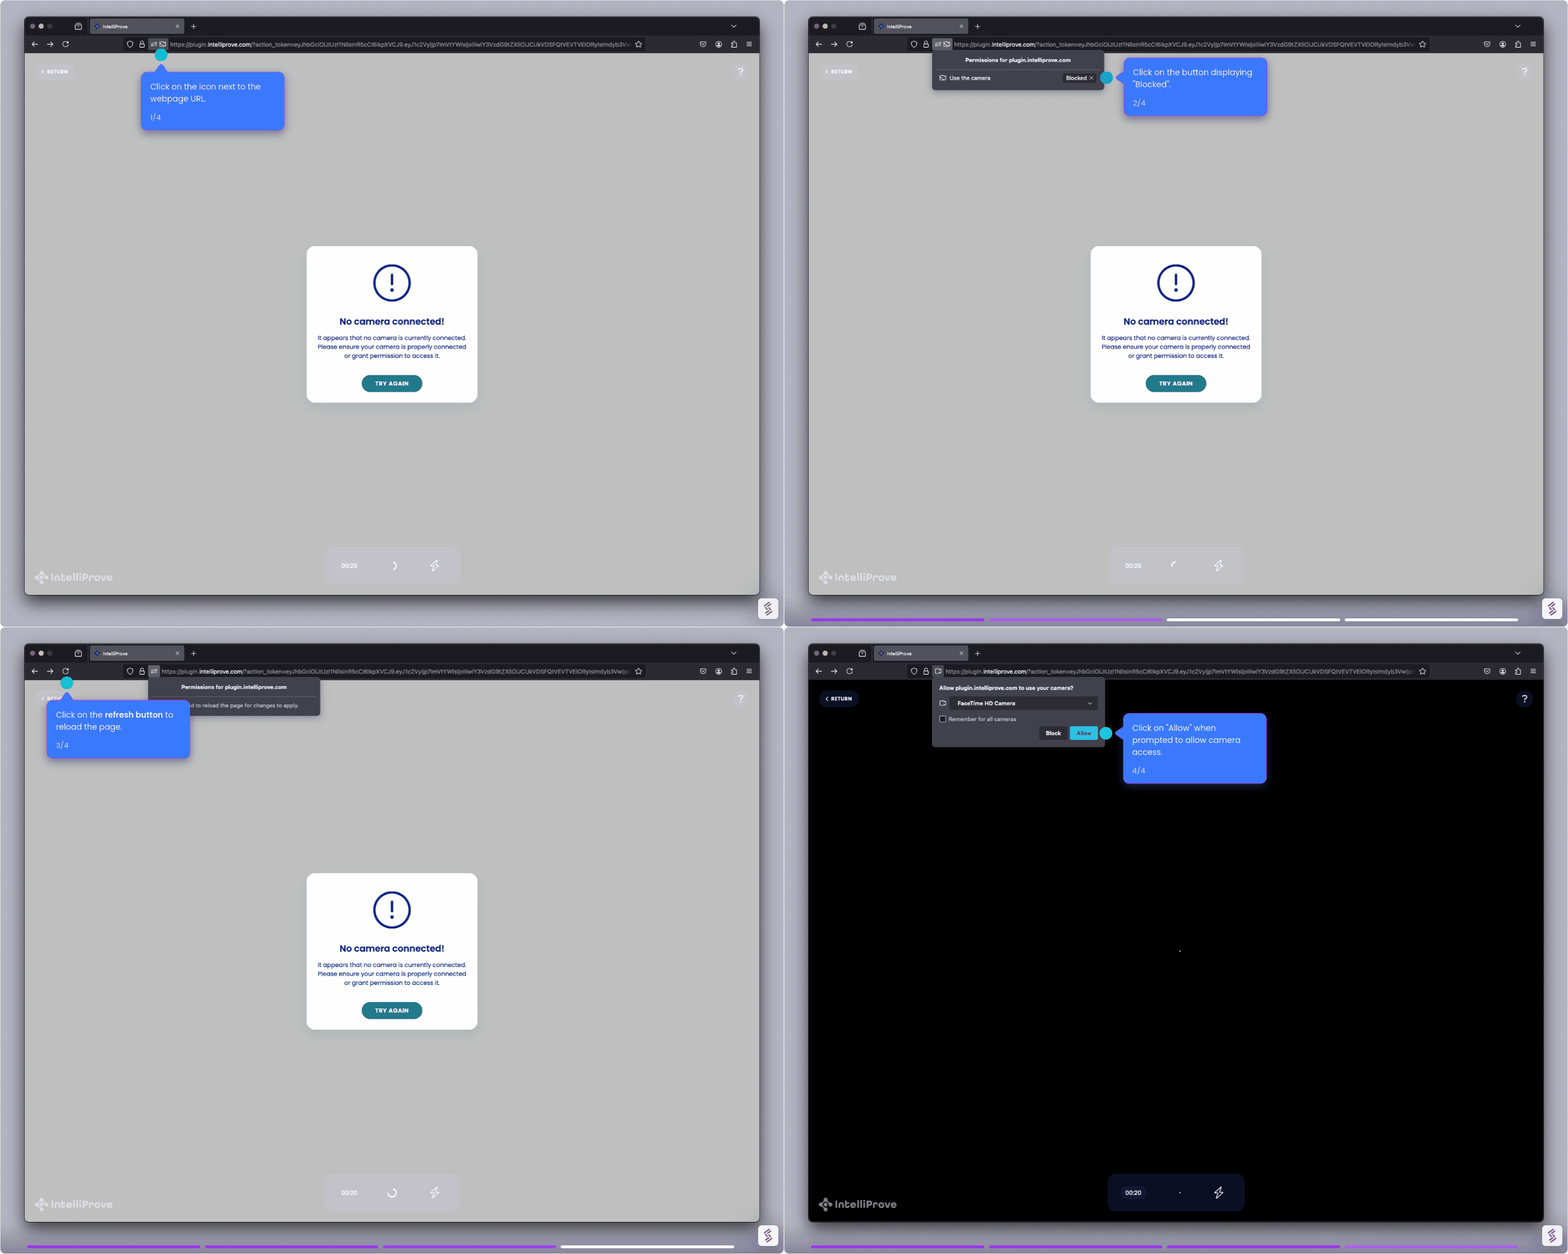
Enable camera access in Firefox
Safari (MacOs)

- Click on the icon to the right of the webpage URL, on the right op the page.
- In the pop-up that appears, click on Website Settings.
- Next to Camera, click on the selector that says "Deny".
- Change the setting to Ask or Allow.
- Verify that the setting net to Camera is now Ask or Allow.
- Click on Try again.
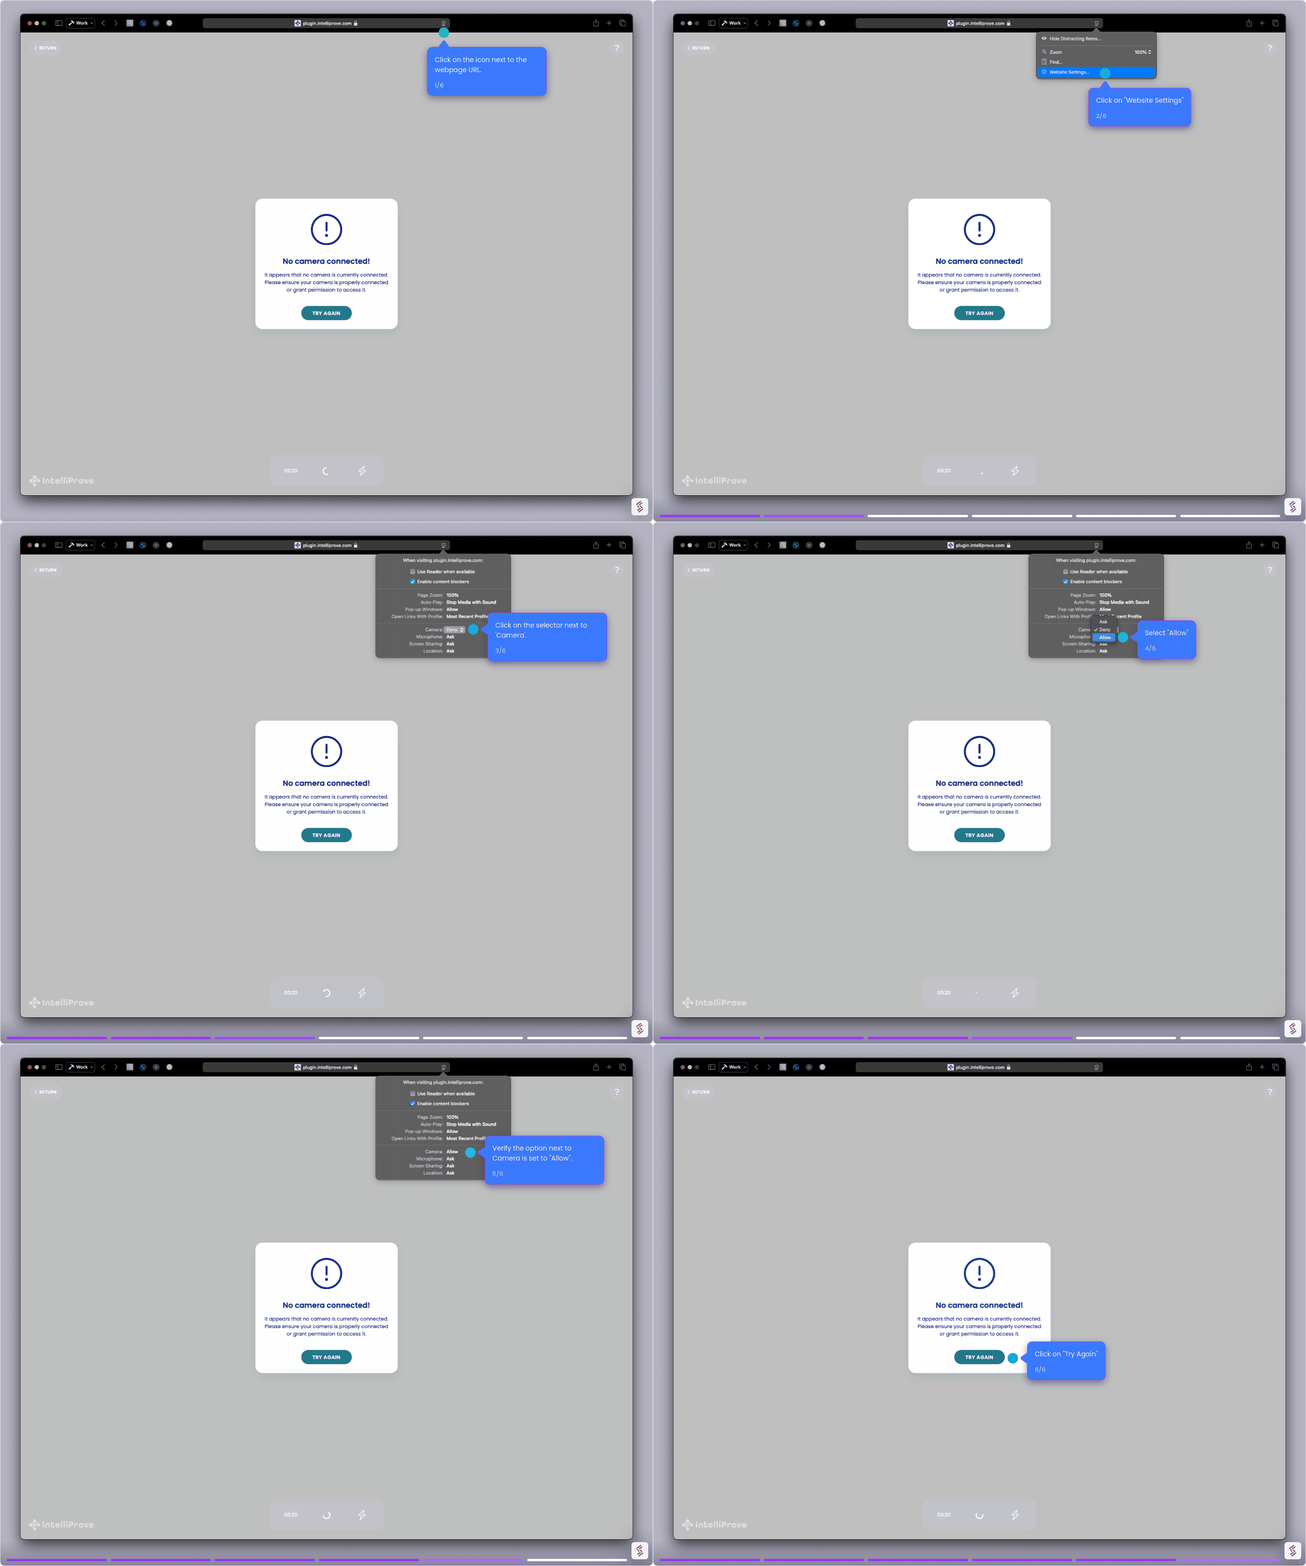
Enable camera access in Safari
Microsoft Edge

- Click on the lock icon next to the webpage URL, on the top right of the page.
- Select the option Always allow website to access your camera.
- Confirm by clicking on Done.
- Click on Try again.
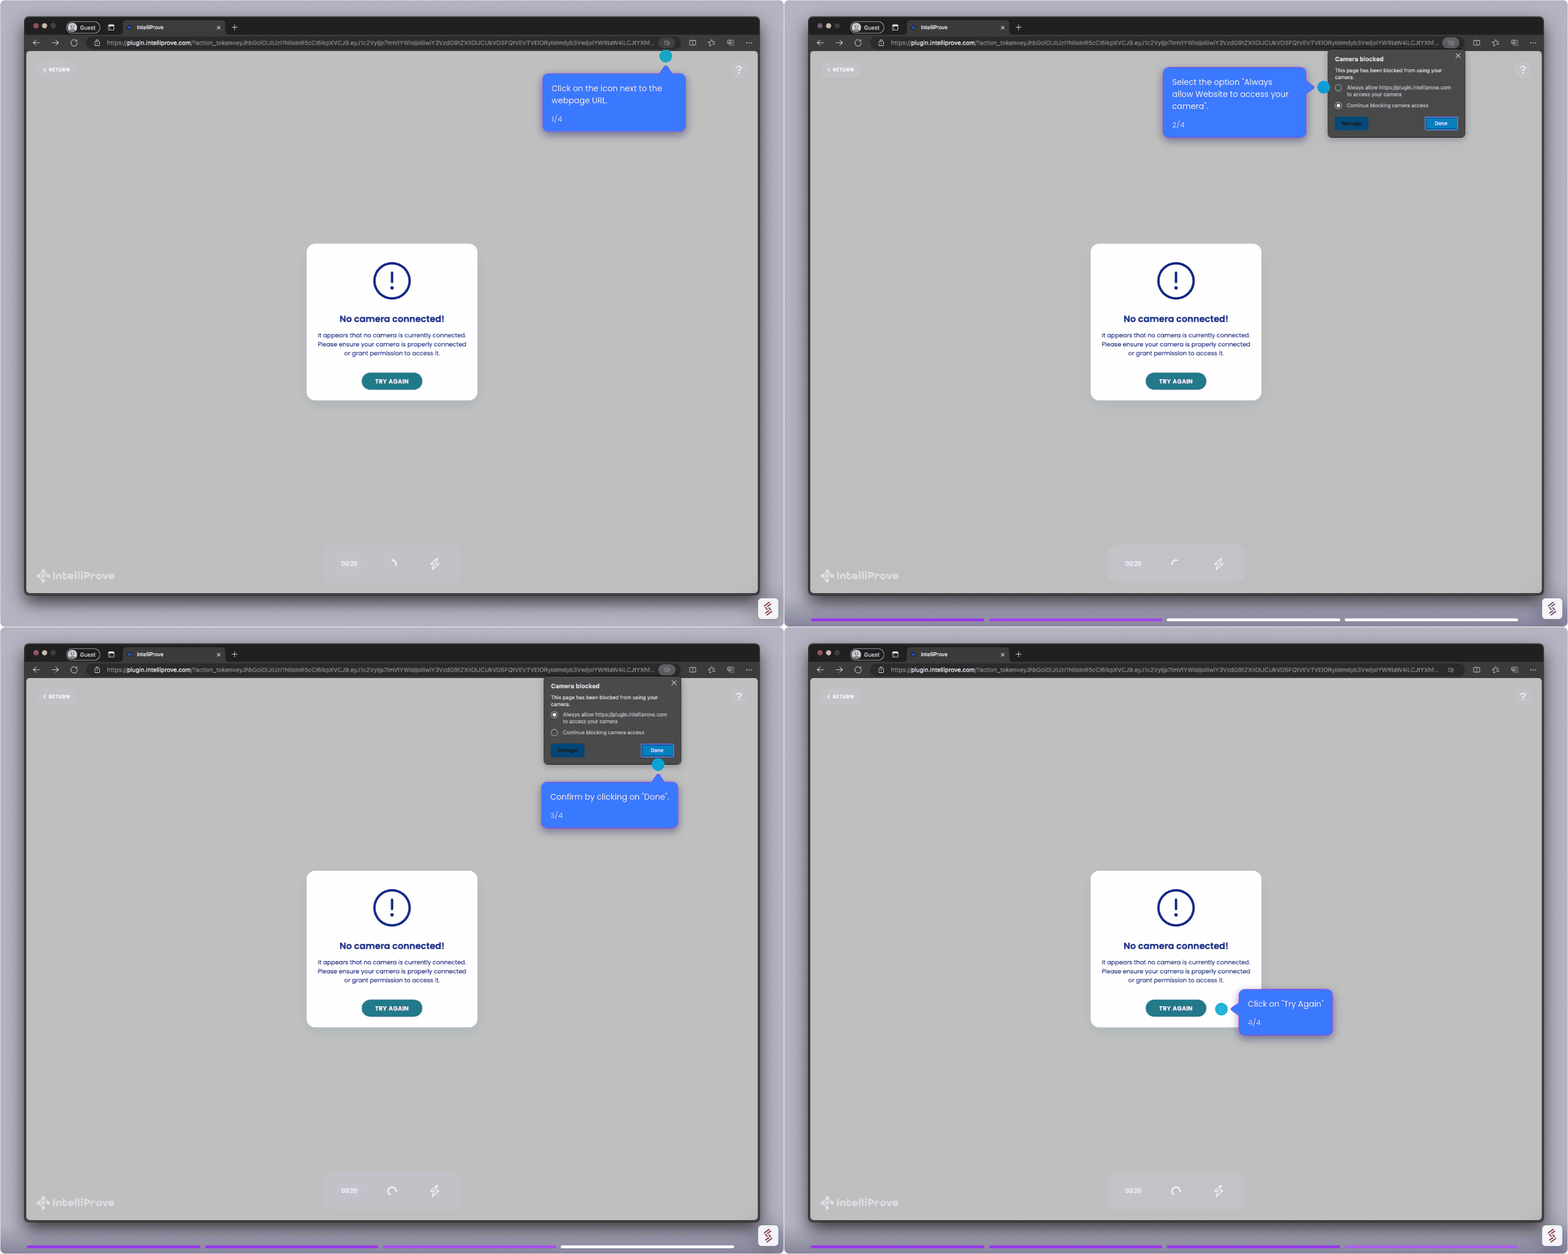
Enable camera access in Edge
Mobile devices
Chrome
- Click on the icon to the left of the webpage URL, on the top left op the page.
- A popup-up will appear. Click on Permissions.
- Toggle the switch next to camera to allow camera access.
- Click on Reset Permissions.
- In the new pop-up that appears, click on Reset.
- Go back to the webpage, and click on Try again.
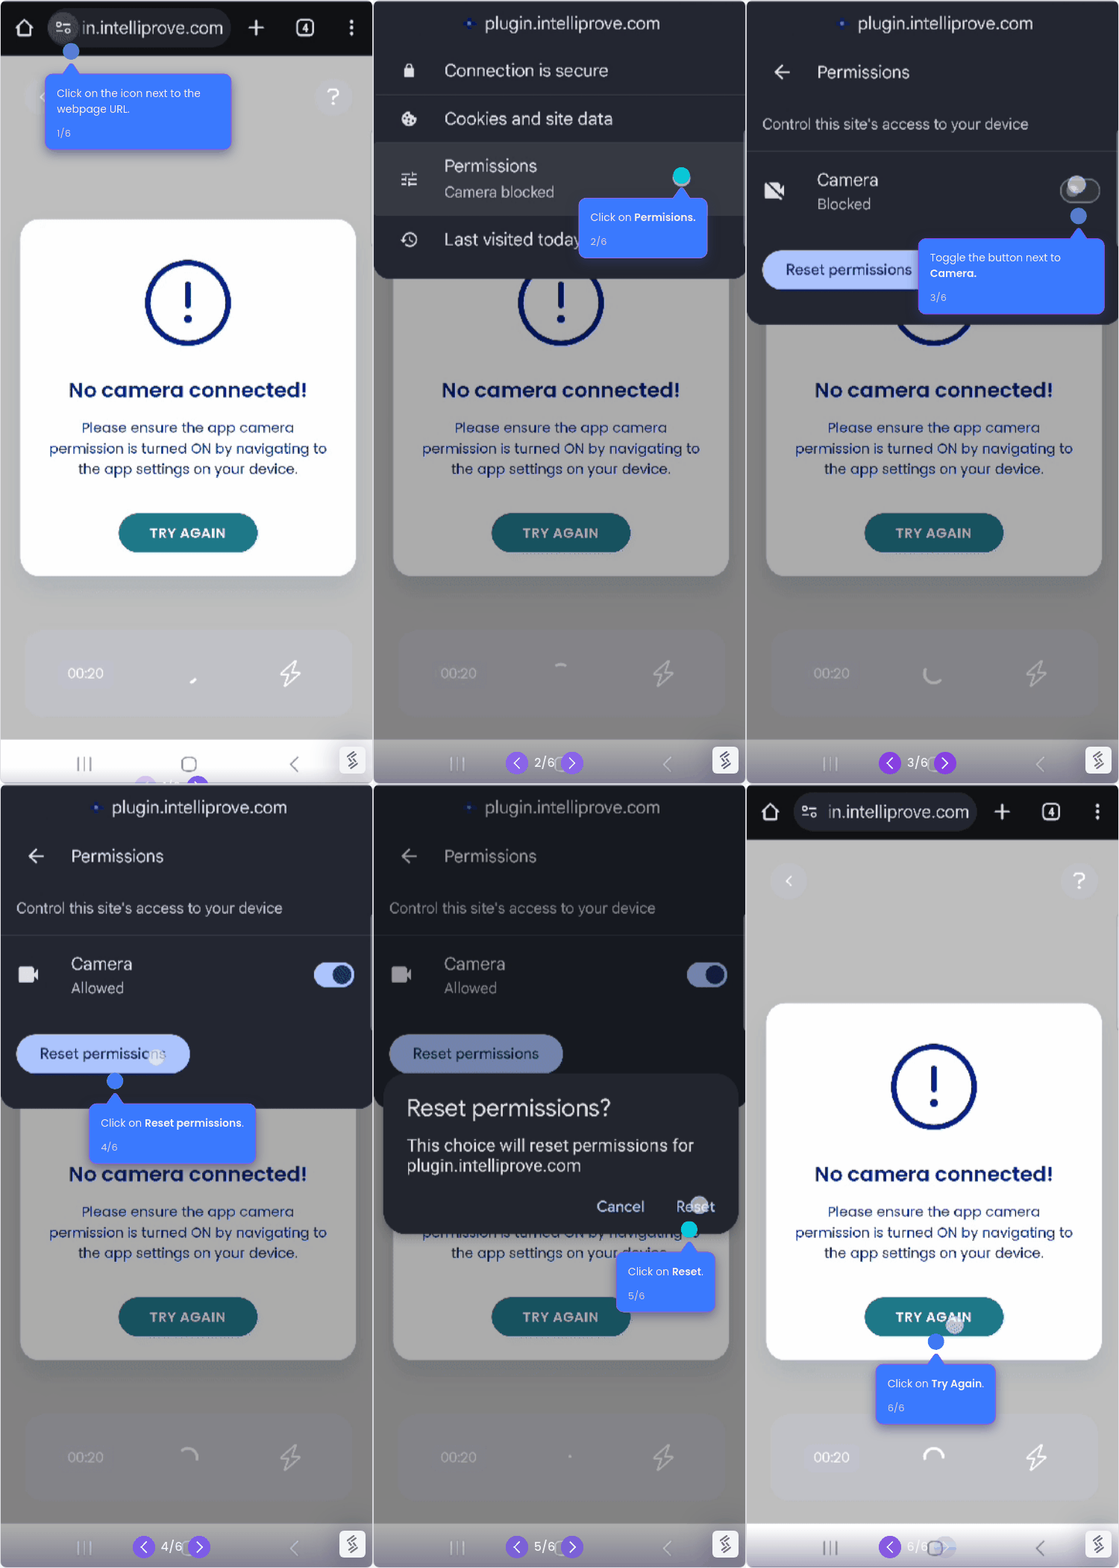
Enable camera access in Chrome (mobile)
Safari
1. Click on Try Again in the pop-up in the middle of the webpage.
2. In the new pop-up that appears, click on Allow.
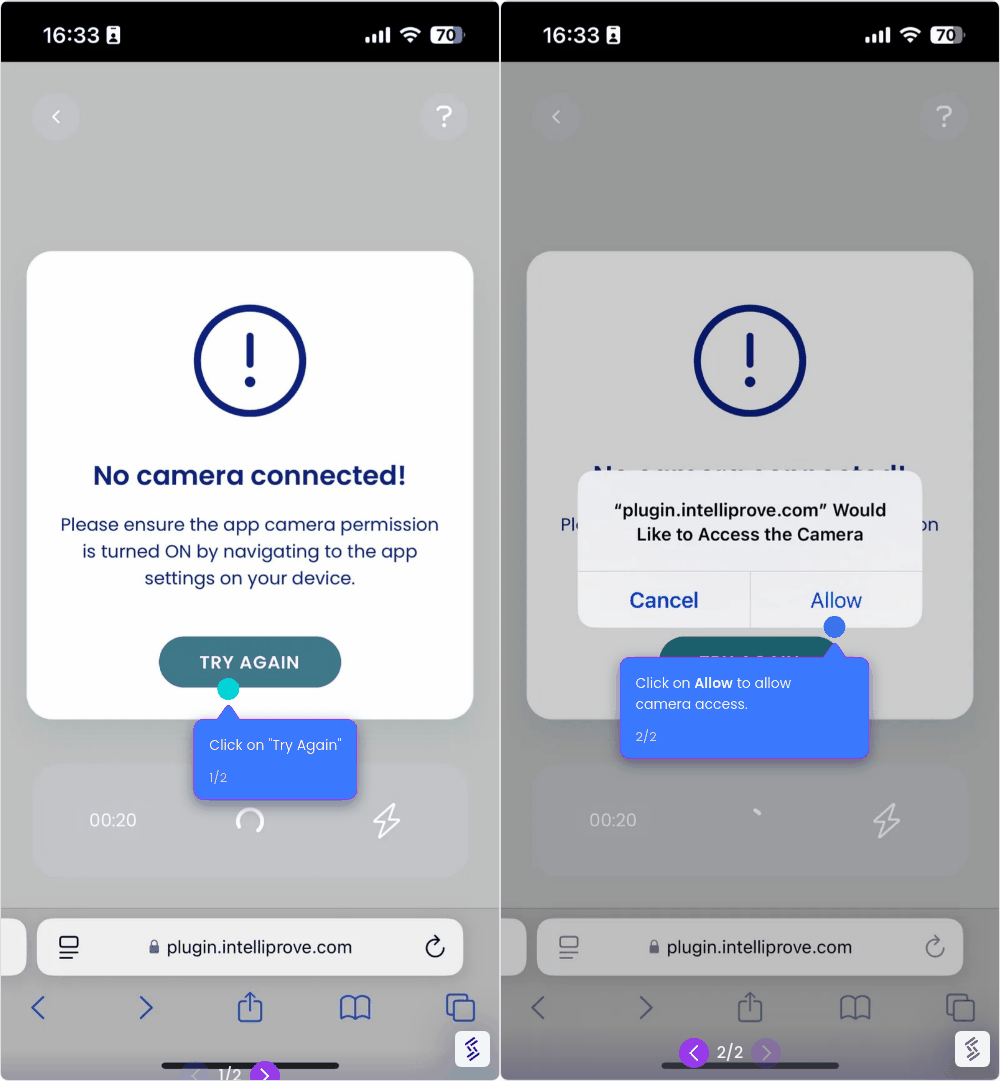
Enable camera access in Safari (mobile)